
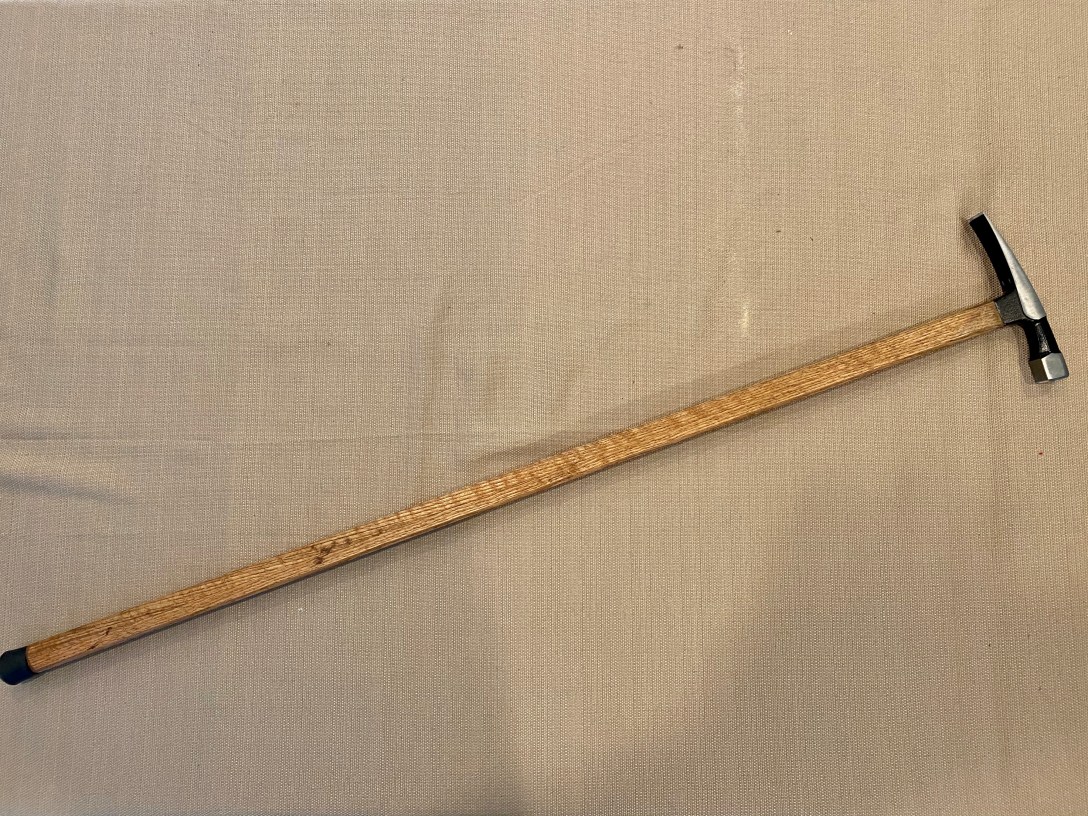
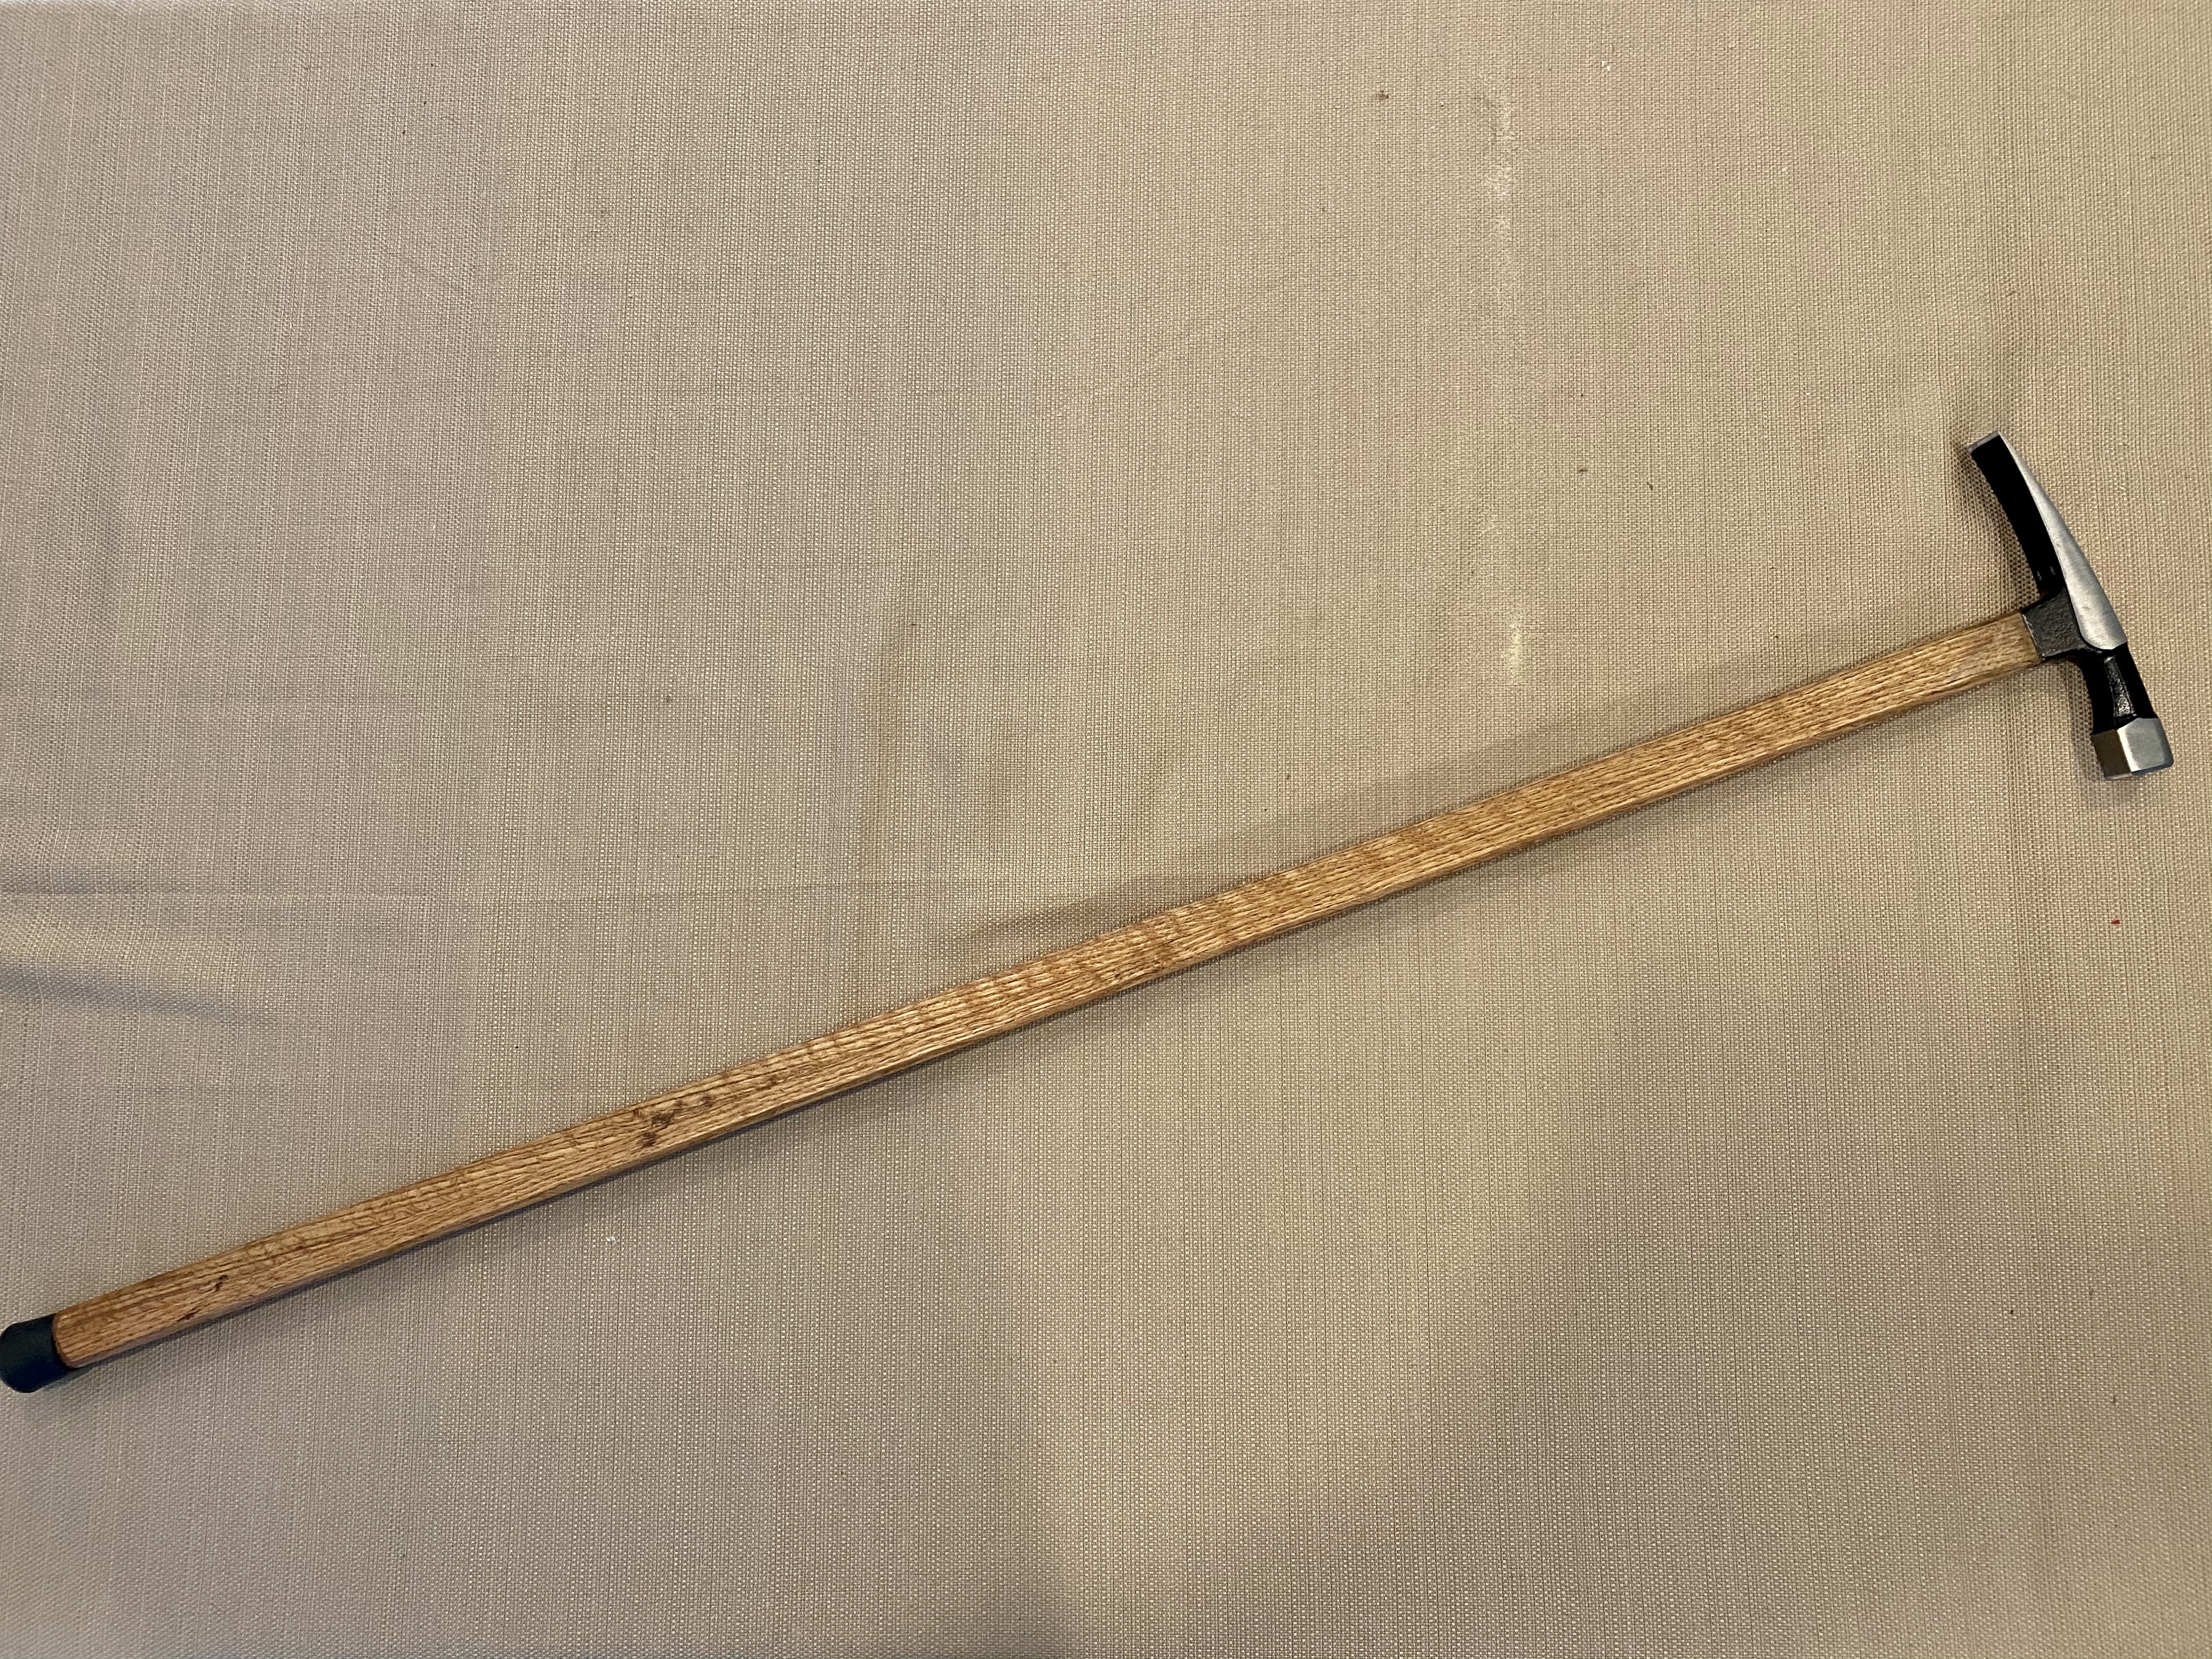
If you are interested in trying out fokos techniques from the book “Hungarian Hussar Sabre and Fokos Fencing” by Russ Mitchell, you will need a Fokos! There are options available for sale on the internet (such as this one https://www.woodenswords.com/Hungarian_Axe_Fokos_p/vb.fokos.9.htm), but I wanted to try and create one myself. I was able to do so by spending $31.78 in materials and using tools I already owned to create something I am fairly happy with. If you wanted, you could do this even cheaper if you had some spare parts around.
Of note, you will notice that my fokos has a hammer head while the traditional weapons had axe heads. I was looking for something a little less dangerous. The method below would work just fine for an axe, just swap out the hammer component for small hatchet.
Materials:
- 2 48 inch pieces of 1×2 red oak from Home Depot, they cut it to length on request for easy transport- $11.42
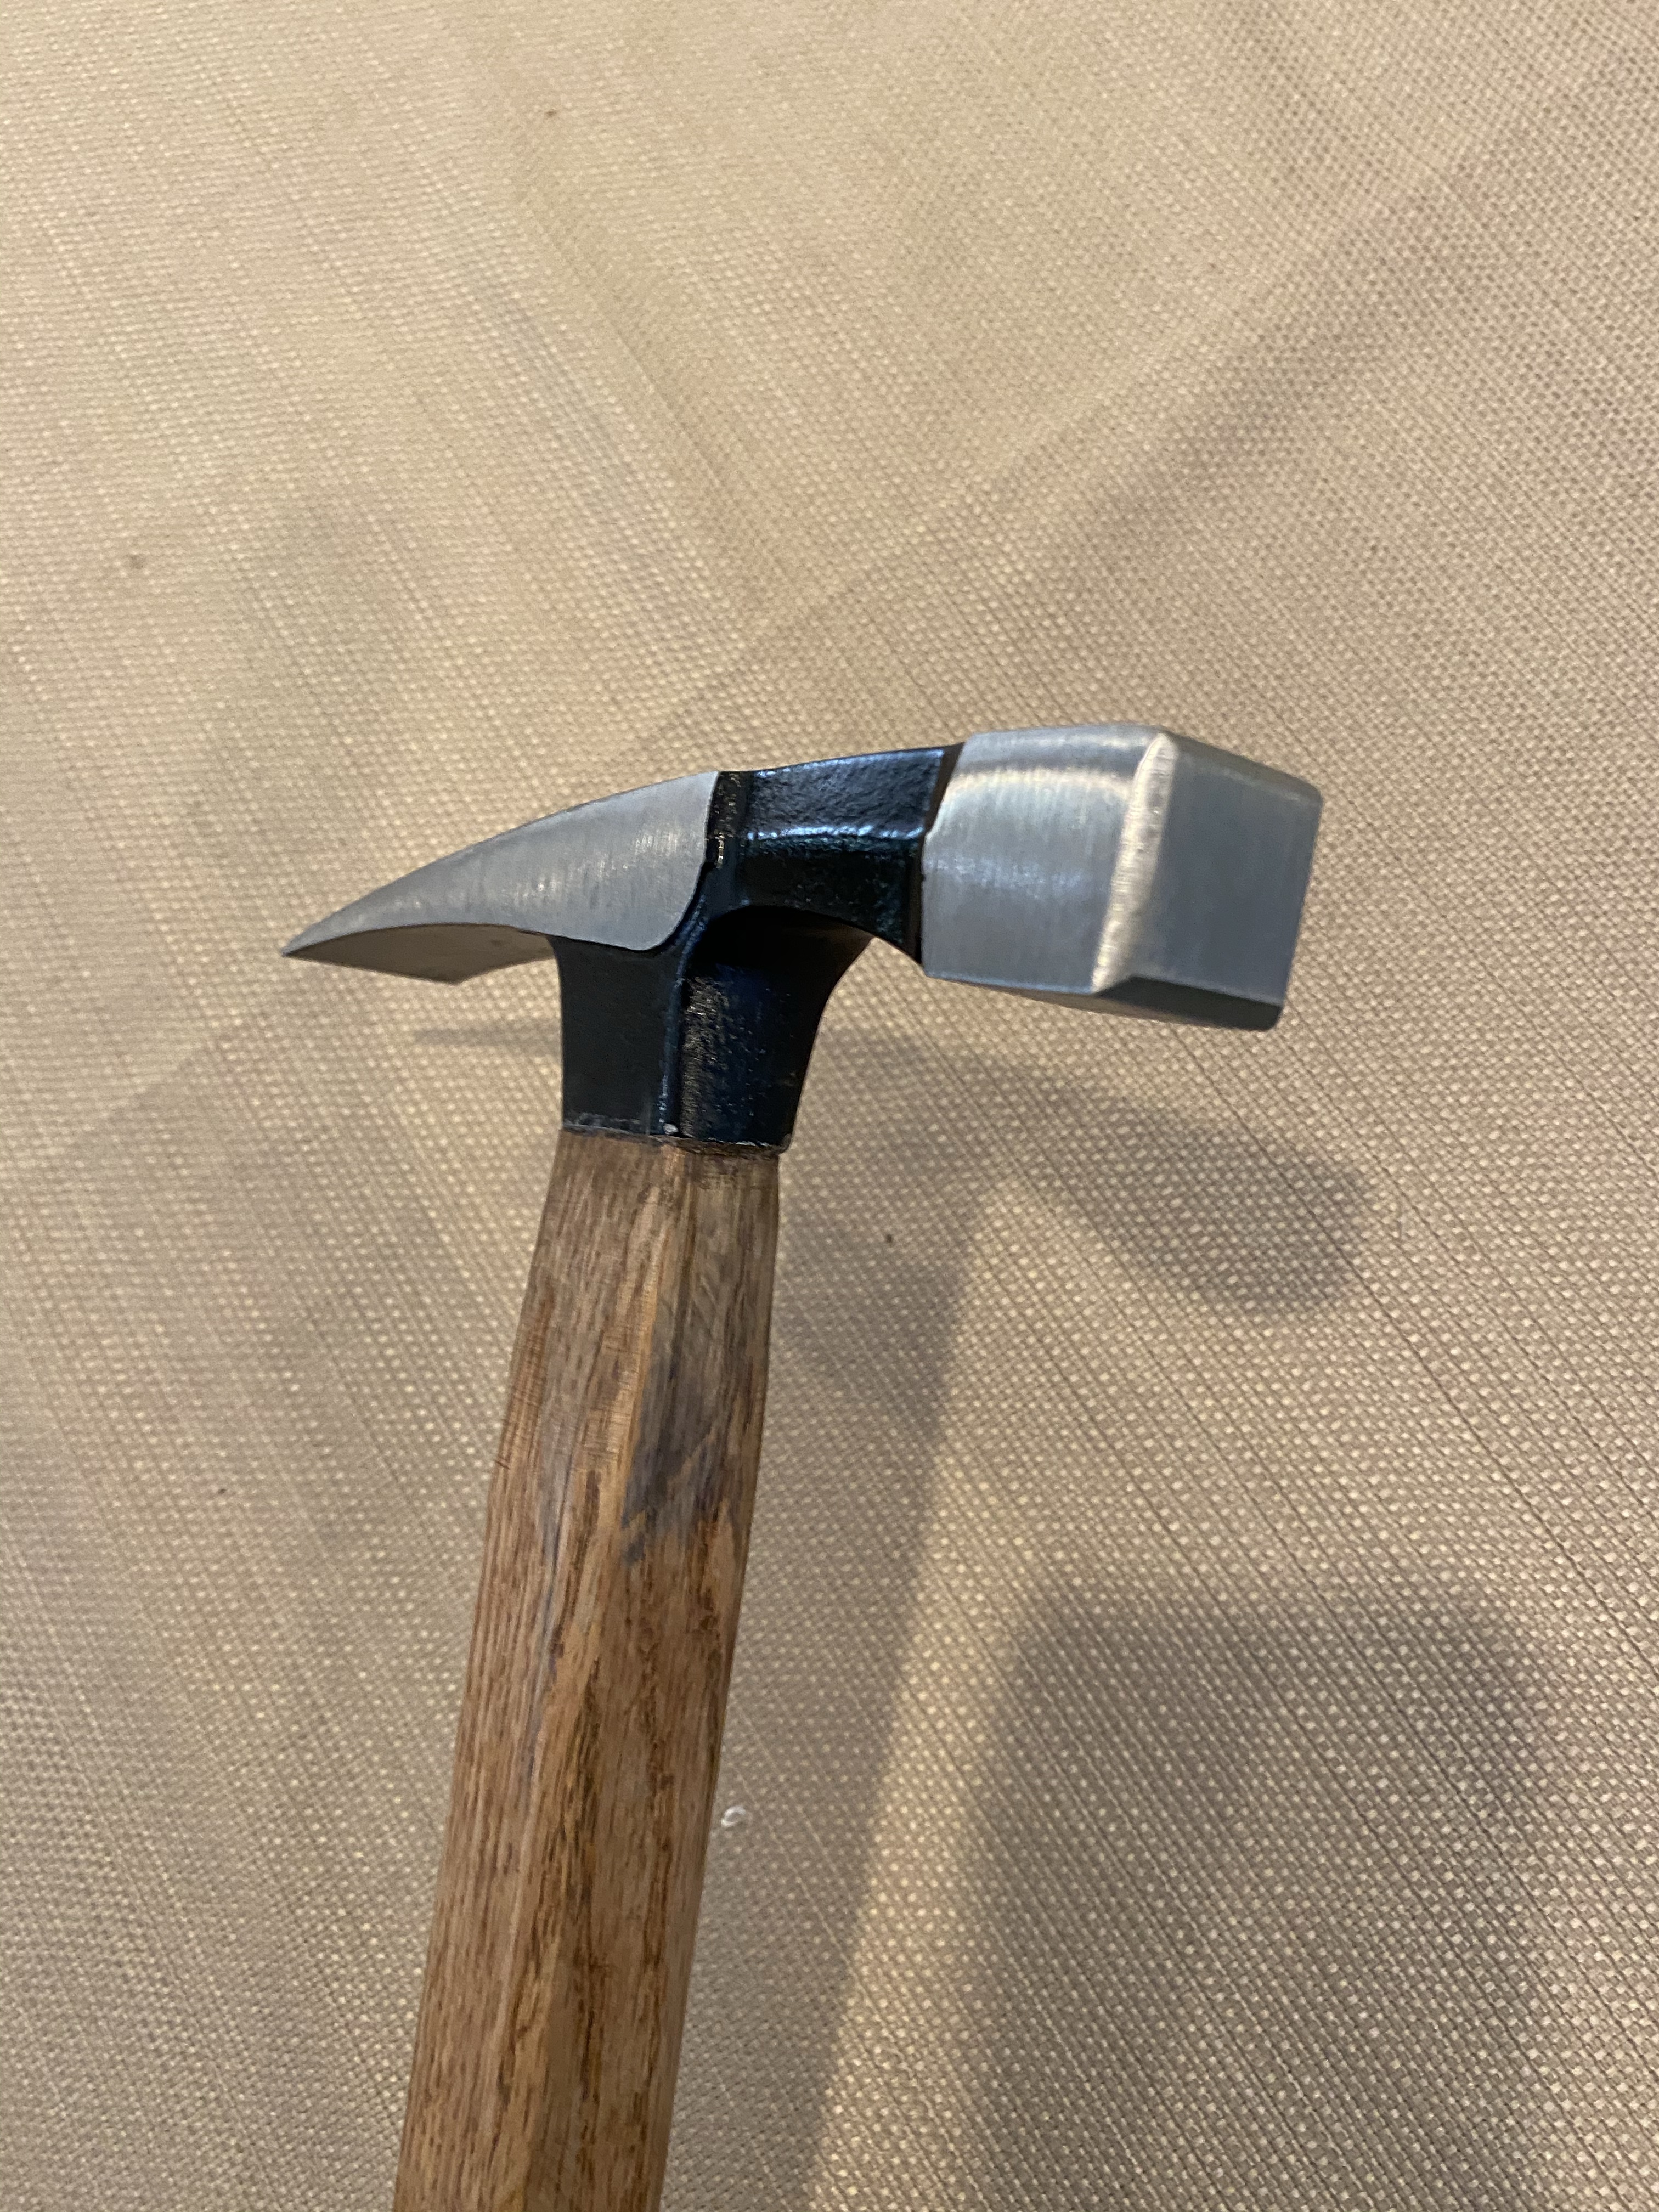
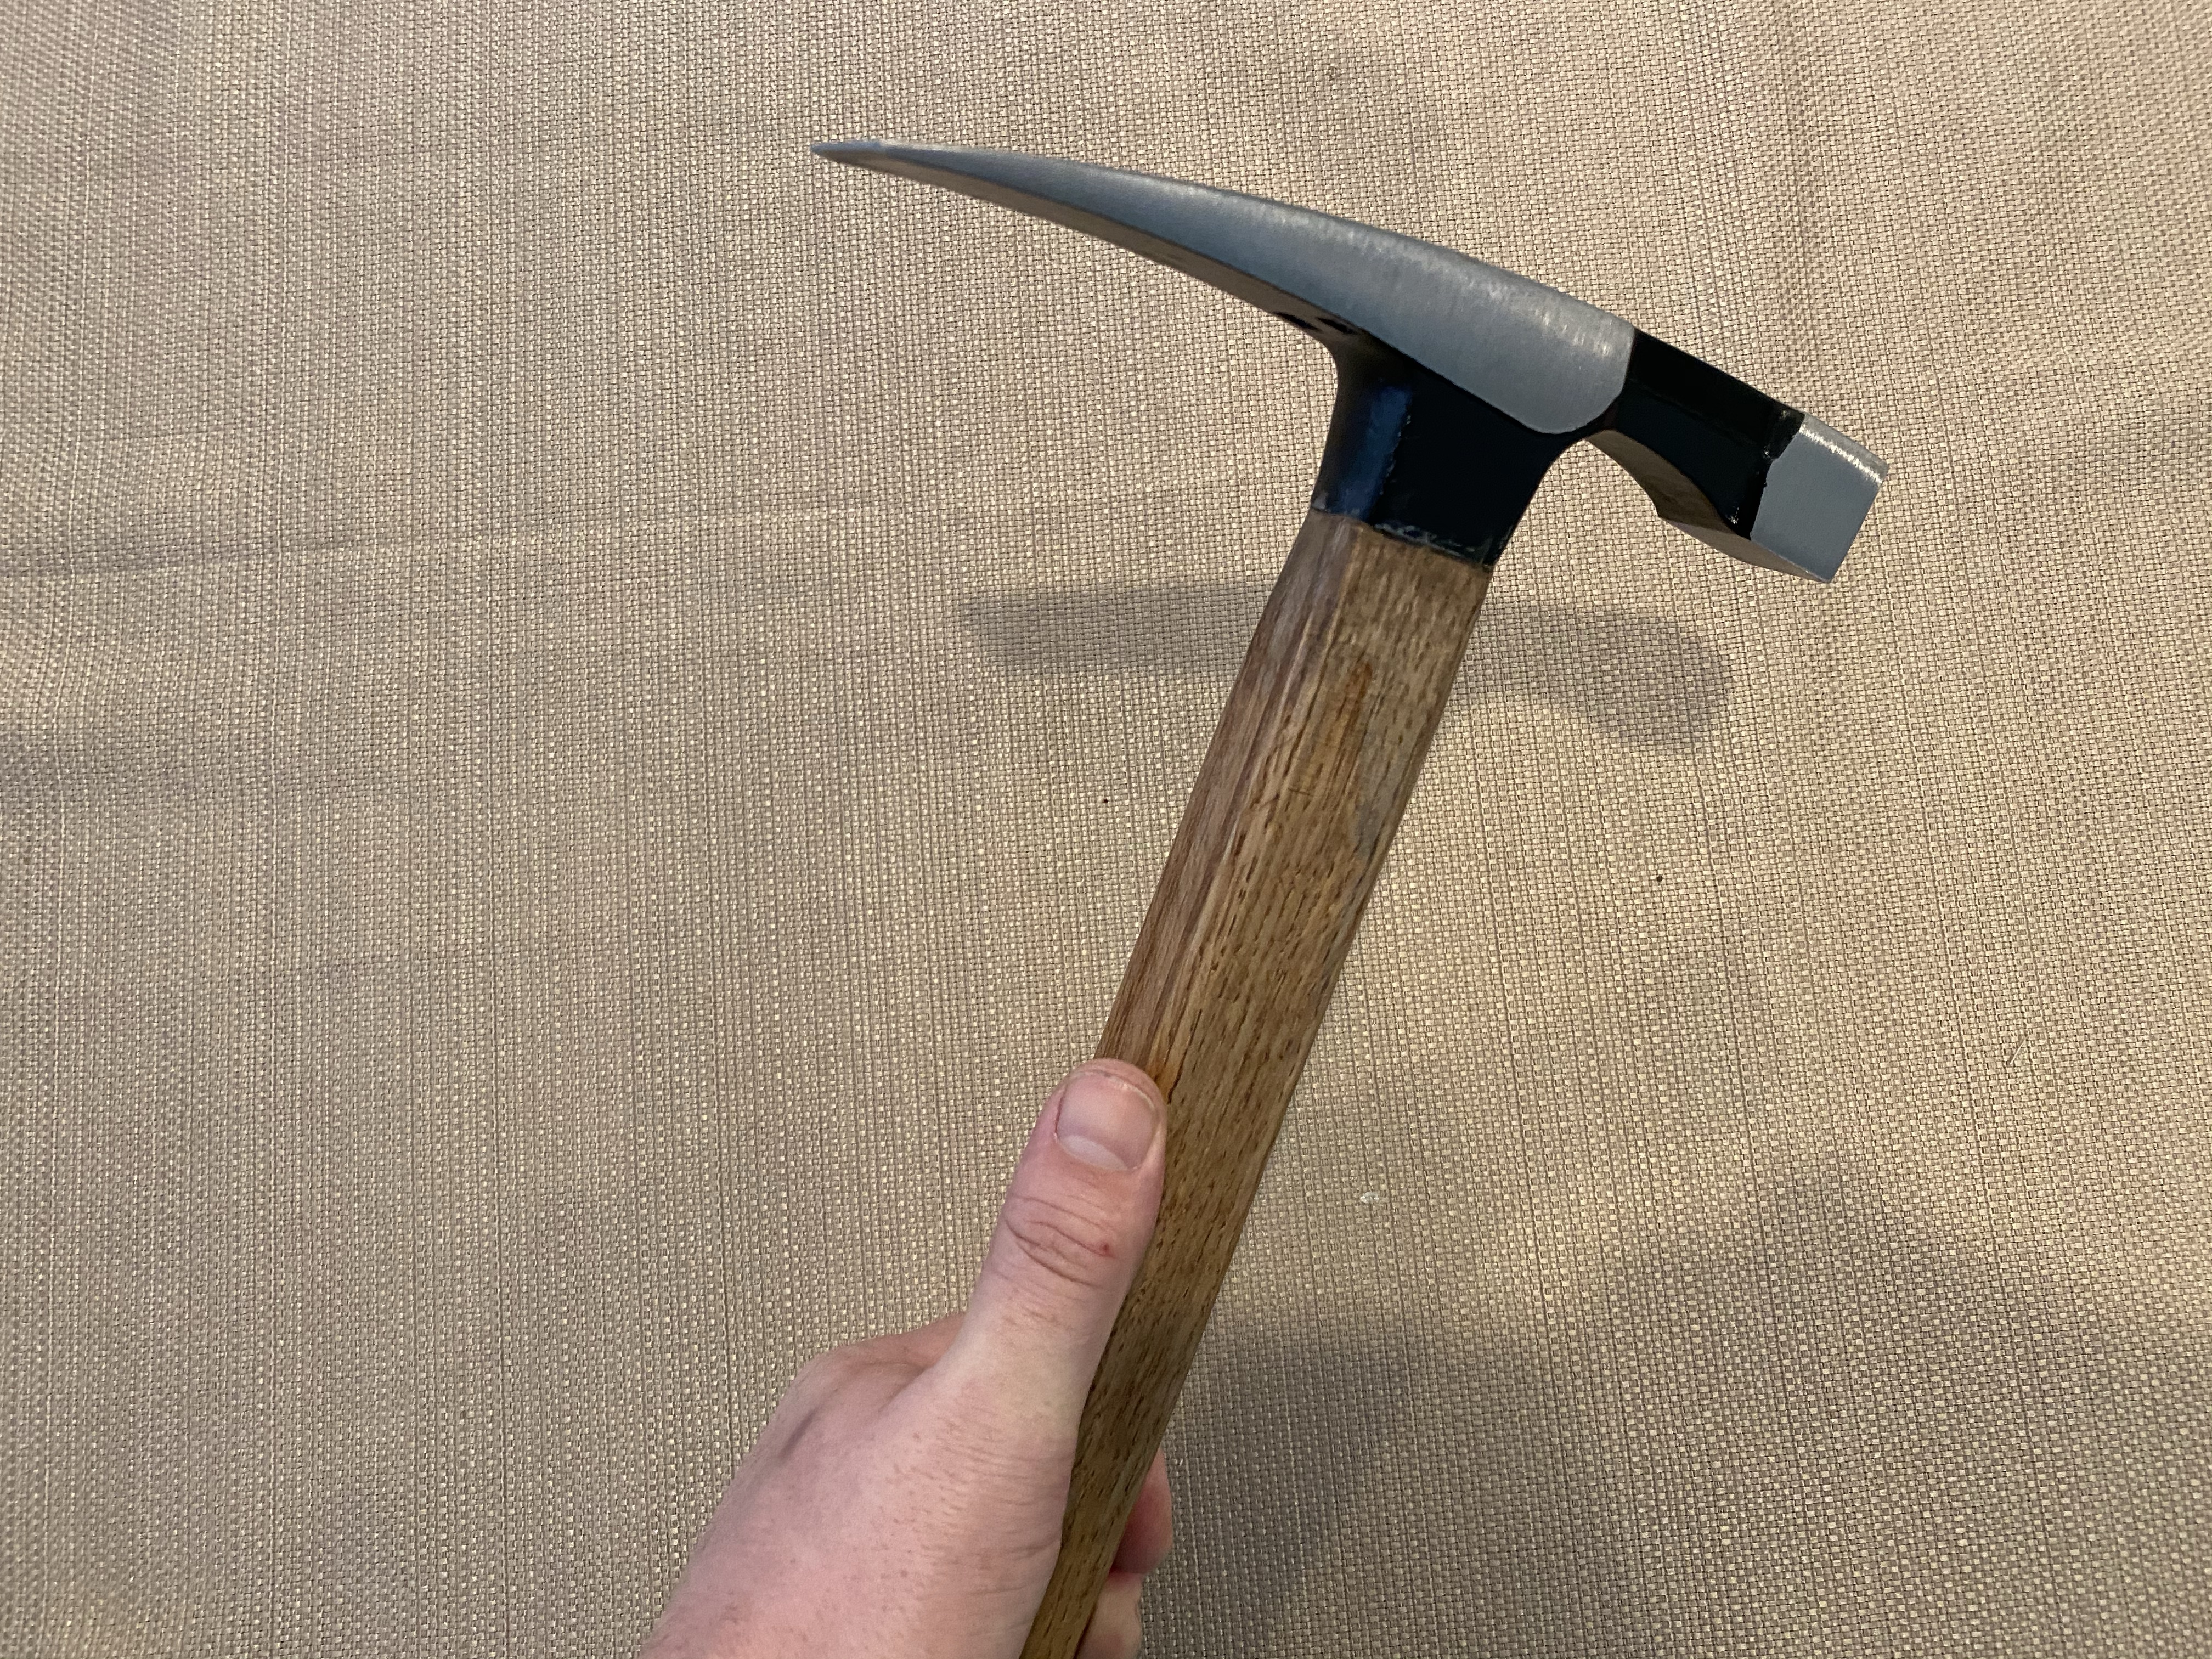
- Mason Hammer from NorthernTool.com. I used a mason hammer as it was long, flat, and light. – $17.98 shipped
- 1 inch table leg caps, pack of 4 from Home Depot – $2.38
Tools (I had all of these):
- Gorilla wood glue
- Clamps
- Table saw
- Chop saw
- Hacksaw (a bandsaw would work better, but I don’t have one)
- Chisel – (again, bandsaw would work better, but I had this handy)
- Sandpaper
- File or belt sander
- Mallet
- Small wooden dowel (used as a punch, could use anything smaller than the width of the hammer handle)
- Wood stain
Steps:
- Glue the two 1×2 wood sections together so you form a 2x2x48 piece with the grain patterns reversed using wood glue and clamps to hold it in place.
- It is important to smear glue over the entire surface.
- The grain of the two pieces of wood should form a V or II pattern when viewed from the side, but not a // or \\ parallel pattern.
- Why do this instead of using a single piece of wood? Glueing two pieces together with opposing grain patterns provides added strength and resists warping. Not needed, but I wanted a strong, straight handle. You can just use a single piece of wood if you prefer simplicity.
- Once dry (I waited 24 hours), remove the clamps and cut just a bit off of each end of the now single piece of wood to make everything square using a chop saw. Miter saw would also work. I suggest preserving as much length as you can until the hammer or axe head is attached so you have room for error.
- Draw lines from each corner to form an X on the ends of the wood. The center of the X is the center of the wood.
- Run through the table saw to remove material from each side of the wood until the general shape of the stick matches comfortable dimensions in your hand.
- A rectangle rather than square shape will help with feel later so that you will be able to tell where the edges of the hammer/axe head are.
- You will have to adjust the saw guide as you remove material to keep the center of the wood constant.
- Set the saw to 45 degrees and take the corners off the wood so that it appears to be an elongated octagon when viewed from the top.
- Take the hammer (or axe if you prefer) and remove the handle. I cut most of the handle off with my chop saw and then drilled some holes in the remaining wood. I then used a dowel as a punch and pounded out the handle from below using a mallet.
- Note, save the metal wedges that secured the handle onto the head.
- Using the hammer (or axe) head as a guide, see how much material needs to be removed to be able to pound the head onto the new, long handle you have created.
- At this point, I used the hacksaw to cut into the sides of the wood handle at a stopping point just below where the head would slide to when attached and then used the chisel from the top to whittle away material until I had a snug fit. If I had a band saw, I would just use that. This is the step with the largest chance of failure. If you make the top of the handle too small, you will have to chop off the part you were working on and start over. This is why we preserved length earlier.
- Once you think the head can be pounded on with your mallet, cut a groove (or grooves) into the top of the handle to put the metal wedges in that you got from the hammer handle once the head is attached. If you don’t have them, you can make a wedge from hardwood.
- Do not have the groove(s) match the glue line from putting the wood together, it needs to be offset or at a 90 degree angle.
- Pound the hammer (or axe) head onto the shaft until it is fully seated.
- Add some wood glue to the top and pound the wedge (or wedges) into the groove(s) you cut earlier until they are as flush as you can get them. The head should now be snug and have no wiggle on the handle.
- Let the glue dry.
- Use the file and/or belt sander to remove any excess handle and/or wedge from the top of the fokos.
- Get a feel for the fokos by swinging it around (carefully). Figure out what length you want it and cut the other end using a chop saw. I like mine long so I can also use it as a walking / hiking stick.
- Using the same process as the hammer or axe head, figure out how much material needs to be removed to attach the rubber cap to the end and mimic the process. The rubber cap can stretch, so leave it a bit larger so that it is snug. I also put a screw in from the bottom to hold it in place, but that might be overkill.
- Sand and stain to preference.
- Done!


I’ve been thinking about making a war hammer/pick using a Mason Hammer from Northern Tool (I live about 10 miles from a store).
This is an exceptional piece, both beautiful and practical. I’m also intrigued by the fokos and would like to create one myself, however, my understanding of it is rather limited.
Could I inquire about the typical weight distribution of the fokos axe? And what variety of hammer do you use in your selection process?
(Apologies as I’m a non-native English speaker, this conversation was translated using a translation software.)